How to Change the Playlist Picture on Spotify on Android

Spotify is a popular music streaming platform that can be accessed through both desktop and mobile devices. One of the features that Spotify offers to its users is the ability to customize the playlist picture.
In this article, we will guide you through the process of changing the playlist picture on Spotify on Android devices.
Step 1: Open Spotify App
Open the Spotify app on your Android device. If you are not already logged in, enter your username and password to access your account.
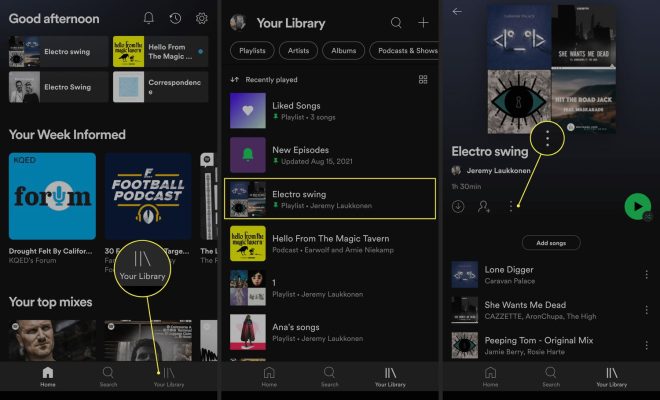
Step 2: Select the Playlist
Choose the playlist that you want to change the picture of. You can select an existing playlist or create a new playlist.
Step 3: Click on Edit
Once you have selected the playlist, click on the “Edit” button located on the top right-hand side of your screen.
Step 4: Choose a New Picture
You will be taken to a new page where you can edit the playlist details. Look for the “Change image” option and click on it.
Step 5: Select an Image
You will be given the option to select a new image for the playlist. You can choose a photo from your gallery or take a new photo. Once you have selected your image, click on “Use” to confirm your selection.
Step 6: Save Changes
After you have selected your new image, click on “Save” to save your changes.
Step 7: Enjoy
Your playlist image has been successfully changed! You can now enjoy your newly customized playlist picture on Spotify.
In conclusion, changing the playlist picture on Spotify on Android devices is a simple and straightforward process that can be done in just a few steps. Personalizing your playlists with customized images adds a personal touch to your music streaming experience. So, start customizing your playlists now!


