How to Transfer Data from iPad to iPad

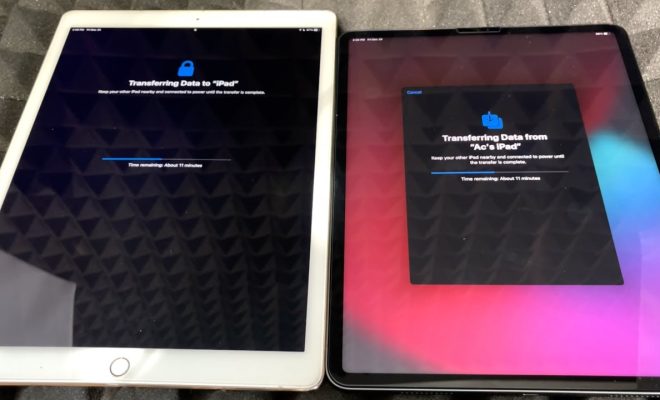
Transferring data from one iPad to another might sound daunting and complicated, but it’s actually a pretty simple process. Whether you’re upgrading to a newer iPad or you just need to share your data with a friend or family member, there are several ways to easily transfer your data from one iPad to another. In this article, we’ll explore some of the most effective methods for transferring data between iPads.
Method 1: Use iCloud
One of the easiest ways to transfer data from one iPad to another is to use iCloud. This method is ideal for those who do not have access to a computer or would like to avoid using iTunes. To use iCloud, follow these simple steps:
Step 1: On your source iPad, go to Settings > iCloud > Backup. Make sure that the iCloud backup is turned on and that a backup has been completed.
Step 2: Once the backup is complete, turn on your destination iPad and go through the setup process until you reach the screen titled “Apps & Data”. Then, choose “Restore from iCloud Backup” and select the backup you just created.
Step 3: Wait for the transfer process to complete. After the transfer is complete, all of your data, including photos, music, videos, apps, and settings, will be available on your destination iPad.
Method 2: Use iTunes
For those who prefer to use a computer for data transfer, iTunes is the best option. iTunes is a free software that you can download on your Mac or PC. Here’s how you can transfer data from one iPad to another using iTunes:
Step 1: Connect your source iPad to your computer and launch iTunes.
Step 2: Click on the iPad icon and select “Back Up Now”. Wait for the backup to complete.
Step 3: Disconnect the source iPad from your computer and connect the destination iPad to the same computer.
Step 4: Click on the iPad icon and select “Restore Backup”. Choose the backup you just created and click “Restore”.
Step 5: Wait for the transfer process to complete. After the transfer is complete, all of your data, including photos, music, videos, apps, and settings, will be available on your destination iPad.
Method 3: Use AirDrop
If you only want to transfer a few files or photos, and you don’t want to use cloud-based services or iTunes, you can use AirDrop. AirDrop is a feature that allows you to wirelessly transfer files between Apple devices. Here’s how you can use AirDrop to transfer data from one iPad to another:
Step 1: Turn on AirDrop on both iPads. To do this, swipe up from the bottom of the screen to open Control Center, then tap AirDrop, and choose “Everyone”.
Step 2: Open the app that has the data you want to transfer on the source iPad. For example, if you want to transfer a photo, open the Photos app.
Step 3: Select the photo or file you want to transfer, tap the “Share” icon, and choose AirDrop. Select the destination iPad’s icon from the list of devices that appear.
Step 4: On the destination iPad, accept the file that is being transferred, and it will be saved to the appropriate folder.
In Conclusion
Transferring data from one iPad to another can seem like a daunting task, but it doesn’t have to be. Using iCloud, iTunes, or AirDrop, you can quickly and easily transfer all of your data, including photos, music, videos, apps, and settings, to your new iPad. No matter which method you choose, taking the time to transfer your data will ensure that you don’t lose any important files.


