How to Rename Your Printer on Windows 11

If you have multiple printers connected to your Windows 11 device, you may want to rename them to easily differentiate between them. Fortunately, it’s a simple process to rename your printer on Windows 11. In this article, we will guide you through the steps to rename your printer on Windows 11.
Step 1: Open Settings
Click on the Windows icon on the bottom left corner of your desktop or press the “Windows key + I” to open the Settings menu.
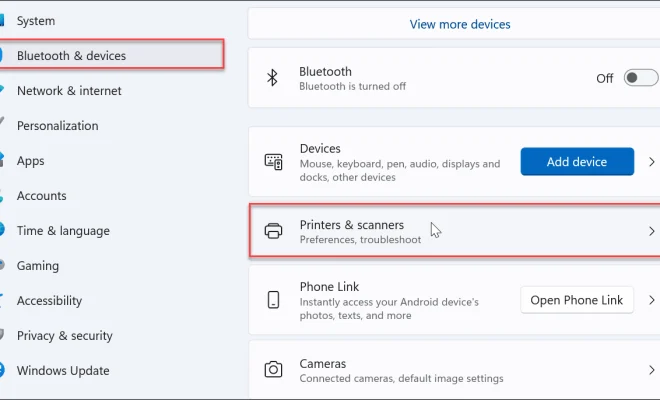
Step 2: Navigate to Printers & scanners
In the Settings menu, click on the “Devices” option, then select “Printers & scanners” from the left-hand side menu.
Step 3: Select your printer
In the “Printers & scanners” section, you will see a list of printers that are connected to your computer. Select the printer that you want to rename.
Step 4: Click on “Manage”
After selecting the printer, click on the “Manage” button under the printer name.
Step 5: Rename your printer
In the “Manage your device” window, you will see the current name of your printer. To rename it, simply click on the current name and type in a new name for the printer.
Step 6: Save changes
After renaming your printer, click on the “Save” button to save the changes you made.
That’s it! You have successfully renamed your printer on Windows 11.
In conclusion, renaming your printer on Windows 11 is a quick and simple process. By following the steps outlined above, you can easily differentiate between multiple printers on your device. If you encounter any issues while renaming your printer, ensure that you have administrative privileges or try restarting your computer before attempting the process again.


