How to Create an Image Sequence in Premiere Pro

Creating an image sequence in Premiere Pro is an easy-to-follow process that can produce stunning results. An image sequence is a series of still images that can be played back as a video. The effect can be used in a variety of applications, from replicating the stop-motion effect to adding a unique visual element to a video. In this article, we will guide you through the steps on how to create an image sequence in Premiere Pro.
Step 1: Import your images into Premiere Pro
To import your images into Premiere Pro, select the “File” menu, and click on “Import”. From the drop-down menu, select “Media”, navigate to the folder containing your images, select all the images, and click “Import”. The images will appear in the project panel.
Step 2: Create a sequence
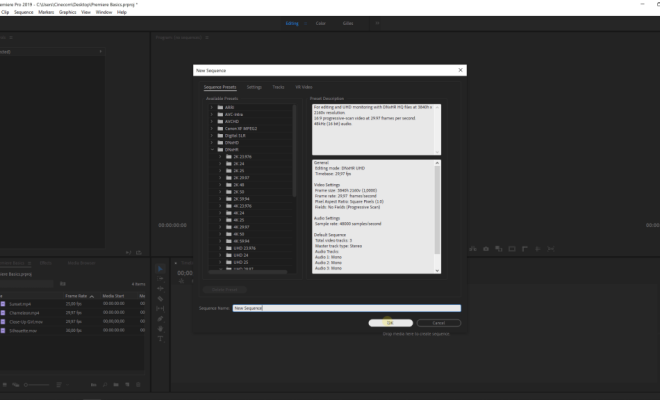
To create a sequence in Premiere Pro, go to the “File” menu and select “New” > “Sequence”. This will open up the “New Sequence” panel. Here, you can customize your sequence settings according to your requirements. Set the dimensions to match the resolution of your images. Also, be sure to set the frame rate to match the frame rate of your images.
Step 3: Drag your images into the timeline
Once you have created your sequence, it is time to add your images. Simply select all your images in the project panel, and drag them onto the timeline panel. They will now appear in the timeline sequence.
Step 4: Adjust the duration of the images
By default, each image will be represented by a single frame in the timeline. To create the image sequence effect, you need to adjust the duration of each image. To do this, click on the first image in the sequence, then hold “Shift” and click on the last image in the sequence to select all of them. Right-click on them, and select “Speed/Duration”. This will open up the “Speed/Duration” panel. Here, you can adjust the duration of each image to your desired time. For example, if you set it to 0.5 seconds, each image will appear for half a second.
Step 5: Export the image sequence
Once you have completed creating your image sequence, it’s time to export it. To do this, select “File” > “Export” > “Media”. This will open up the “Export Settings” panel. Here, you can select your output format, video codec, and other settings. Once you have everything configured, click on “Export”.
In conclusion, creating an image sequence in Premiere Pro is a straightforward process that can be completed in a few easy steps. With this guide, you can now add an extra creative element to your video projects.


