How to Change the System Language on Windows 10

Changing the system language on Windows 10 can be beneficial if you are more comfortable in your native language or if the current language is not your preferred language. Luckily, Windows 10 makes it quite easy to change the system language.
Here is a step by step guide on how to change the system language:
Step One: Open the Settings App
To open the Settings app on Windows 10, navigate to the Start Menu and click on the gear icon. Alternatively, you can use the keyboard shortcut “Windows key + I” to open the Settings app directly.
Step Two: Navigate to the Time & Language Menu
After opening the Settings app, you will see various categories of settings. Among them, you should see “Time & Language.” Click on this option to open the Time & Language menu.
Step Three: Click on Language
Once you have opened the Time & Language menu, you will see various settings. Click on the option labeled Language.
Step Four: Add a New Language
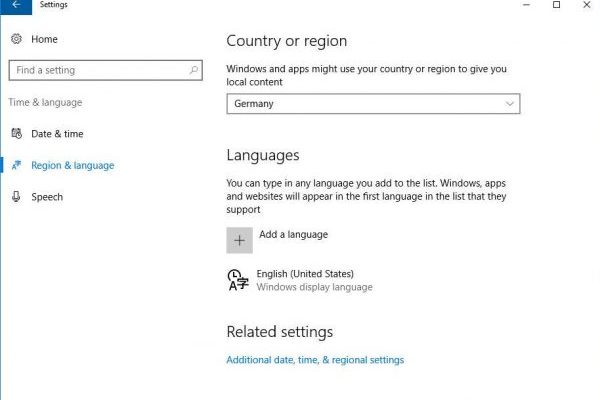
On the Language screen, you can see the current display language of Windows 10. If this is not what you want, click on the plus (+) sign beside “Add a language” to add a new language of your choice.
Step Five: Set the New Language as Default
After adding a new language, you need to make sure it becomes the default language. Click on the new language you just added, and then click on the button labeled “Set as default.” Windows will prompt you to confirm the change – click yes.
Step Six: Restart Your PC
Finally, after making changes, you will need to restart your PC for the changes to take effect.
In conclusion, changing the system language on Windows 10 is straightforward and easy. It is an essential process because it personalizes your Windows 10 experience while allowing you to be more comfortable with the computer’s interface. Follow the six steps outlined above to change the system language and enjoy using Windows 10 in your preferred language.


