How to Use the Built-in Image Editing Tools in Photos on Mac

If you are a Mac user and love taking photos, then you must be familiar with the Photos app. It’s a great way to keep all of your photos organized, edit and enhance them. But did you know that the Photos app also has a built-in image editing tool? That’s right, you can use this tool to make your photos look even better. In this article, we will show you how to use the built-in image editing tools in Photos on Mac.
1. Open the Photos app
The first step is to open the Photos app. You can do this by clicking on the Photos icon in your Dock or by opening it from the Applications folder in Finder.
2. Select the photo you want to edit
Once the app is open, find the photo you want to edit and double-click on it. This will open the photo in its own window.
3. Click on the Edit button
In the top right-hand corner of the window, you will see an Edit button. Click on it to open the editing tools.
4. Basic editing tools
The basic editing tools are located at the bottom of the screen. These tools include Crop, Filters, Adjust, and Retouch.
a. Crop: You can crop your photo to get rid of any unwanted elements or to change the composition of the photo. Simply click on the Crop tool and drag the edges of the photo to adjust the crop.
b. Filters: There are several filters you can choose from to give your photo a different look. Click on the Filters tool and select the filter you like.
c. Adjust: The Adjust tool allows you to make adjustments to the brightness, contrast, and saturation of the photo. You can also adjust the exposure and sharpness.
d. Retouch: The Retouch tool allows you to remove blemishes or other imperfections in the photo. Simply click on the Retouch tool and then click on the area of the photo you want to retouch.
5. Advanced editing tools
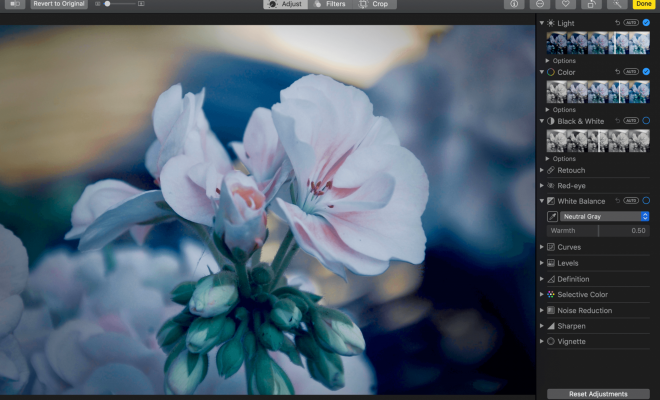
To access the advanced editing tools, click on the Adjust button in the top right-hand corner of the screen.
a. Light: This tool allows you to adjust the exposure, highlights, shadows, contrast, and brightness of the photo.
b. Color: The Color tool allows you to adjust the saturation, contrast, and cast of the photo.
c. Black & White: You can use this tool to convert your photo to black and white and adjust the intensity of the black and white effect.
d. Levels: The Levels tool is used to adjust the brightness and contrast of the photo by adjusting the levels of the shadows, mid-tones, and highlights.
6. Save your edited photo
Once you have made your edits, make sure to save your photo by clicking on the Save button in the top right-hand corner of the screen.


