How to Use Disk Utility in macOS
Disk Utility is an essential tool for maintaining the health of your Apple computer. This versatile tool allows Mac users to manage disks, partitions, volumes, and drives, while also resolving disk-related issues. Here’s a guide on how to use Disk Utility and effectively manage your storage drives.
1. Locating Disk Utility
Disk Utility is a built-in application in all Mac computers, and it’s located in the Applications > Utilities folder. Alternatively, you can access it using Spotlight by pressing “Command + Spacebar” and typing “disk utility” in the search field.
2. Managing Disks and Volumes
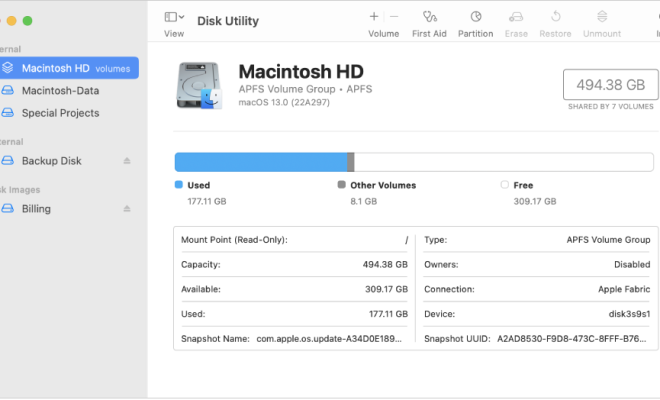
When you open Disk Utility, you will see a list of all volumes and external drives connected to your Mac. You can select any drive or volume and access the features available in Disk Utility. Some of the things you can do include creating or resizing partitions, reformatting drives, mounting and ejecting disks, and verifying or repairing disk permissions.
3. Repairing Disk Permissions
Disk Utility can be useful for fixing any disk-related issues. In the left pane, select the disk you want to repair, then click on the “First Aid” button in the toolbar. Then, click on “Run” to allow Disk Utility to start scanning and repairing the disk, which can help fix disk errors.
4. Removing a Partition
If you want to merge two partitions or remove one altogether, Disk Utility can help with that. First, select the partition you want to remove in the left pane. Then click on the “Erase” button in the toolbar and select the format of the partition. Finally, click the “Erase” button to delete the partition and reformat the drive.
5. Creating a Bootable Drive
A bootable drive is a highly useful tool, which can be used to reinstall macOS or troubleshoot any issues on your Mac. To create a bootable drive, you need an external drive that you can dedicate to this purpose. First, connect the external drive and format it by selecting it from the left pane and then clicking on the “Erase” button in the toolbar. Then, select “Mac OS Extended” or “APFS” as the format and click “Erase” to format the drive.
Finally, from the main menu, select “File” > “New Image” > “Blank Image.” Name the file and choose the “DVD/CD Master” format. Click “Save” and then select your external drive from the left pane. Drag the newly created disk image to the external drive and restart your Mac, holding down the Option key on the keyboard. You’ll then see the option to boot from the external drive.
In short, Disk Utility is an essential tool for macOS users to manage and diagnose any issues with their storage drives. By following these tips, you’ll be able to effectively manage your drives and keep your Mac running smoothly.