How to Stop Automatic Driver Updates on Windows

Windows updates are a crucial aspect of ensuring that your computer functions optimally. Nevertheless, the automatic driver updates included in these updates may break some of your systems or devices. This can be frustrating, especially if you’re experiencing critical windows driver issues. To avoid such inconveniences, disabling automatic driver updates on Windows can be an excellent solution. Here are a few steps on how to stop automatic driver updates on Windows.
Using Windows Update or Group Policy
The first option to disable automatic driver updates on Windows is using the Windows Update settings or Group Policy. Here are the steps:
1. Press the Windows key + R on your keyboard
2. Type “gpedit.msc” command in the Run box. This will open the Local Group Policy Editor window.
3. In the Local Group Policy Editor window, navigate to the Computer Configuration\Administrative
Templates\Windows Components\Windows Update path.
4. Locate the “Do not include drivers with Windows Updates” policy on the right-hand side of the window.
5. Check the box next to “Enabled” and click “Apply” then “OK” to save the changes.
Using Device Installation Settings
Alternatively, you can also use the Device Installation Settings feature to disable automatic driver updates on Windows. Follow the steps below to do so:
1. Press the Windows key + R on your keyboard
2. Type “SystemPropertiesAdvanced.exe” in the Run box to open the System Properties window.
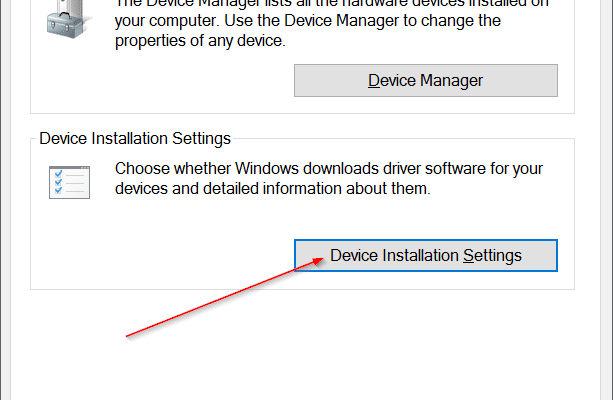
3. Navigate to the Hardware tab and click on the “Device Installation Settings” button.
4. Click on “No, let me choose what to do” and select “Never install driver software from Windows Update.”
5. Click “Save changes” to apply the settings.
Using Registry Editor
Another option to disable automatic driver updates on Windows is using the Registry Editor. Here are the steps:
1. Like before, press the Windows key + R on your keyboard
2. Type “regedit” and click “OK” to open the Registry Editor window.
3. Navigate to the path HKEY_LOCAL_MACHINE\SOFTWARE\Policies\Microsoft\Windows
4. Create a new folder by right-clicking on the Windows folder and selecting “New”>> “Key.”
5. Name the folder “WindowsUpdate.”
6. Create another folder within the WindowsUpdate folder and name it “AU.”
7. In the right pane, right-click on “DisableWindowsUpdateAccess” and click “Modify.”
8. Change the value from 0 to 1 and click “OK” to save the changes.
In conclusion, automatic driver updates on Windows can sometimes cause issues. By following the above steps, you can disable automatic driver updates on your computer and take control of your updates. If you need to update your driver’s software, you can do it manually or use a reliable driver updater tool that won’t break your system.


