How to Set up a Wireless Extender and Extend Your Wi-Fi Range

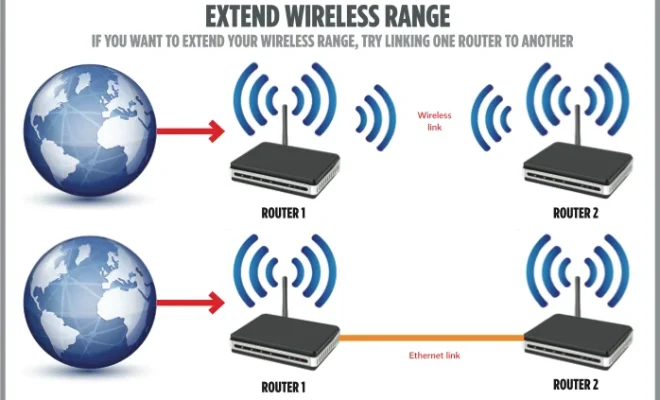
Having a strong Wi-Fi signal is a must, especially now that most people are working and studying from home. However, most routers have limitations when it comes to range, and that’s where wireless extenders come in. These devices can help extend the range of your Wi-Fi network and eliminate dead spots in your home. In this article, we’ll talk about how to set up a wireless extender and extend your Wi-Fi range.
Step 1: Find a Good Location for Your Extender.
Before anything else, you need to find a good location for your extender. The best place to put your extender is halfway between your router and the area where you have weak signal or dead spots. Keep in mind that if you place your extender too far from your router, it won’t be able to pick up the signal, and if you place it too close to the router, it won’t extend the signal range. So, be sure to find a good spot where your extender can relay the signal from your router.
2: Connect Your Extender to Power.
Once you’ve found a suitable spot for your extender, plug it into a power outlet. Keep in mind that you should avoid using power strips or surge protectors when plugging in your extender.
Step 3: Connect Your Extender to Your Router.
After plugging in your extender, you need to connect it to your router. To do this, use an Ethernet cable to connect your extender to your router. Once both devices are connected, turn your extender and your router on.
Step 4: Set Up Your Extender.
Once your extender and router are connected, you need to set up your extender. The exact set-up process will vary depending on the brand and model of your extender. However, most extenders require you to log into a setup page in your web browser. To access the setup page, you’ll need to find the IP address of your extender. You can find the IP address of your extender in the user manual or on the sticker on the device.
Step 5: Configure Your Extender Settings.
Once you’ve accessed the setup page, you need to configure your extender settings. You’ll typically have the option to choose your Wi-Fi network name and network password. Make sure you pick the same network name as your existing network, so all your devices can connect to the same network without any issues.
Step 6: Test Your Wi-Fi Connection.
After you’ve completed the set-up and configuration process, you should test your Wi-Fi connection. Check to see if you have a better signal range than before, and if you’re still experiencing any dead spots, try moving your extender to another location.


