How to Set Up a Projector and Laptop for Presentations

Presentations are always a nerve-wracking experience, regardless of whether you’re a seasoned professional or presenting for the first time. One way to enhance your presentation is through the use of a projector and a laptop. However, setting up a projector and laptop for presentations can be complicated, especially if you’ve never done it before. Here are some simple steps to help you set up your projector and laptop for your next presentation.
Select the Right Projector
The first thing you need to do is select the right projector for your presentation. You should consider the size of the room, the brightness of the light, and the distance from the projector to the screen. It’s also essential to choose a projector that has the right connections for your laptop.
Make Sure Your Laptop and Projector Have Compatible Connections
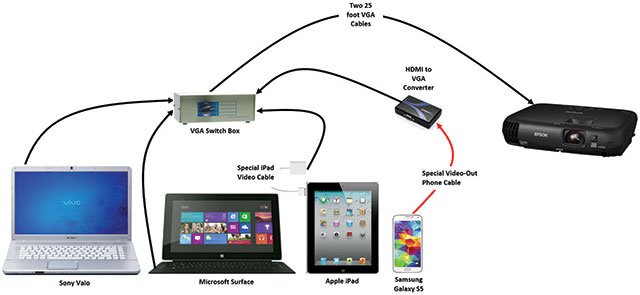
Most modern laptops have an HDMI port, which is compatible with most projectors. However, if your laptop doesn’t have an HDMI port, you’ll need a different type of connection, such as VGA or DVI. Make sure you check both the laptop and projector to see which ports are available. If your laptop and projector don’t have the same type of port, you’ll need an adapter cable to connect them.
Connect the Laptop to the Projector
Once you’ve selected the right projector and ensured the laptop and projector have compatible connections, it’s time to connect them. Turn off both the laptop and the projector, and then connect the appropriate cables to both devices. Turn the projector on and select the correct input, such as HDMI or VGA. Then, turn the laptop on and configure the display settings.
Configure the Display Settings
Windows and macOS both have built-in display settings that allow you to configure how the laptop’s display outputs to the projector. For Windows, go to the display settings, and select “Extend Desktop” or “Projector Only.” For macOS, go to the system preferences, select “Displays,” and then select the “Arrangement” tab. Check the “Mirror Displays” box to have the laptop screen mirror the projector.
Adjust the Display and Sound
Once the laptop is connected to the projector, you’ll need to adjust the display and sound. Most projectors have settings to adjust the brightness, contrast, and focus of the projected image. You should also adjust the sound settings to ensure the audio is coming from the right source. You can access the audio settings by going to the “Sound” option in the “Control Panel” or “System Preferences.”
Setting up a projector and laptop for presentations requires a little bit of planning and effort. However, once you’ve got everything connected and configured, you’ll be able to deliver a professional-quality presentation that your audience will appreciate. Remember to select the right projector, ensure compatible connections, connect the laptop to the projector, configure the display settings, and adjust the display and sound. Follow these simple steps, and you’ll be ready to go in no time!


