How to Roll Back a Driver in Windows 10

As windows 10 is quite an easy operating system to use, rolling back a driver is not a complicated process. Sometimes when after updating a driver, problems may arise and the system can behave in an unexpected manner. In such situations, rolling back a driver to its previous version is highly beneficial. Here is a step-by-step guide on how to roll back a driver in Windows 10:
Step 1: Access the Device Manager
Firstly, navigate to the Device Manager, which can be done by right-clicking on the start menu, selecting Device Manager. Alternatively, you can also access it via the Control Panel.
Step 2: Select the Driver
Once you are on the Device Manager screen, find the hardware for which you want to roll back the driver. Click on the device so that it highlights, and right-click on it to bring up the context menu. From the list of options, choose Properties.
Step 3: Select the Rollback Driver Option
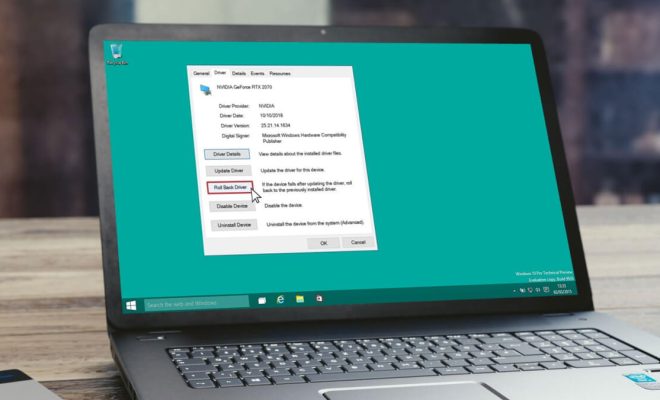
On the hardware properties screen that appears, click on the Driver tab, then click on “Roll Back Driver.” A window will appear asking if you want to restore the driver to the previous version. Click Yes to proceed.
Step 4: Provide the Reason
After you select the Roll Back Driver option, the system will request a reason for the rollback. Provide a reason for rolling back the driver in the text box provided and select a reason from the dropdown menu.
Step 5: Complete the Rollback Process
After providing the required information, click on the roll-back driver button. The rollback may take a few minutes to complete, depending on the system configuration and the size of the driver. Once the process is complete, the computer may require a restart.
In conclusion, rolling back a driver is a beneficial technique that can be useful when a new driver update causes issues with your system. By following these easy steps, you can easily rollback the driver to its previous version. This simple technique can help to keep your computer operating smoothly and efficiently.


