How to Reset a Nest Cam

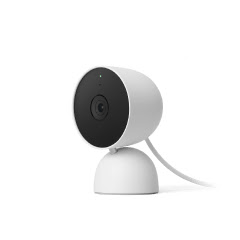
A Nest Cam is a smart security camera that helps you keep an eye on your home or office remotely. However, at times, you may face issues with your Nest Cam, such as the camera not connecting to the internet, or the camera failing to stream video. If you encounter such issues, resetting your Nest Cam is one of the solutions.
Here is a guide on how to reset a Nest Cam:
1. First, locate the reset button on the Nest Cam. It is located on the back of the camera, near the power cable.
2. Use a small, pointed object, such as a paper clip, to press and hold the reset button for at least ten seconds.
3. Once you release the reset button, the LED on the front of the Nest Cam will turn off and then turn back on again.
4. Wait for the Nest Cam to restart, and it will automatically reconnect to your Wi-Fi network.
Note: Resetting your Nest Cam will erase all custom settings, including Wi-Fi network information and camera preferences.
In case you are still experiencing problems with your Nest Cam after resetting it, follow these additional troubleshooting steps:
1. Check your Wi-Fi connection, and ensure that your internet connection is stable.
2. Restart your Wi-Fi router or access point and wait for it to reconnect.
3. Ensure that the Nest Cam is getting sufficient power by checking the cable and making sure it is securely plugged in.
4. If you have multiple Nest Cams, ensure that you have assigned them unique names and that they are connected to the right power outlets and Wi-Fi networks.
5. If none of the above steps work, you can contact Nest Support by going to their website and requesting help.
In conclusion, resetting your Nest Cam can resolve many common issues with the device. When resetting your Nest Cam, ensure that you understand that all custom settings will be erased. As such, be ready to set up your Nest Cam again from scratch. With these steps, you can be able to reset your Nest Cam and keep your home or office safe with the best smart security camera technology available today.


