How to Put a Key Back on a Laptop Keyboard

Laptop keyboards are prone to damage and one of the common problems faced by laptop users is losing a key or having it fall off. This can be quite frustrating, especially if it’s a frequently used key like the “Shift” or “Enter” key. However, putting a key back on a laptop keyboard is not as difficult as it seems. Here’s a step-by-step guide on how to do it.
Step 1: Locate the Key
The first step is to locate the key that has fallen off. Check to see if the key is still intact or if any of its pieces or clips are missing. If the key is still intact, then you can proceed to the next step.
Step 2: Check the Retaining Clip
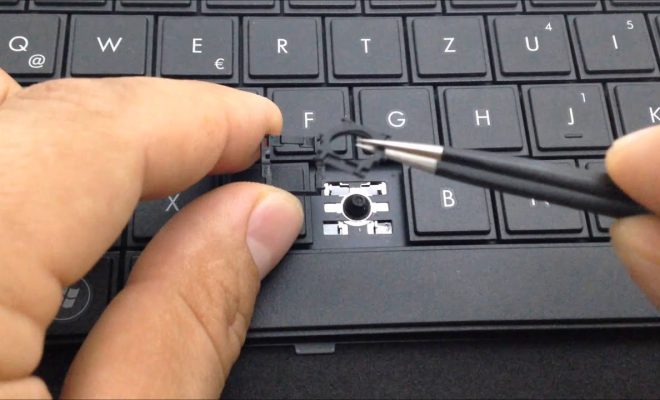
The retaining clip is a small plastic piece that keeps the key in position. Check to see if it’s still attached to the keyboard or if it has fallen off together with the key. If the retaining clip is missing, then you may need to order a replacement clip.
Step 3: Align the Key and Clip
Align the key with the retaining clip, making sure that the clips on the key and clip are interlocked properly. Hold the key down with one hand and press down on the clip with the other hand until it clicks into place.
Step 4: Test the Key
Test the key by pressing down on it to make sure that it’s working properly. If it’s not, then you may need to remove the key and clip and try again.
Step 5: Snap the Key into Place
Finally, snap the key into place by pressing down on it firmly. You may hear a click sound when the key snaps into place.
Conclusion
Putting a key back on a laptop keyboard is a fairly simple process that requires a little bit of patience and attention to detail. Always make sure that the retaining clip is aligned properly and securely attached to the keyboard. If you encounter any problems, refer to your laptop’s manual or seek help from a professional. With these simple steps, you can fix your laptop keyboard and continue using your laptop without any inconvenience.


