How to Pair Meta (Oculus) Quest 2 to a Phone

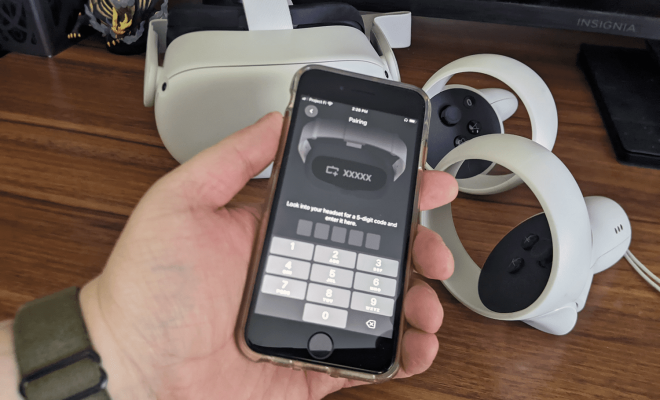
The Meta (formerly Oculus) Quest 2 is a fantastic virtual reality headset that allows you to fully immerse yourself in a virtual world. But did you know that you can pair the Quest 2 to your phone for a more seamless experience? In this article, we’ll take you through the steps of pairing your Meta Quest 2 to your phone.
Step 1: Ensure that you have the Meta app installed on your phone. The Meta app is available for both iOS and Android devices, and it allows you to set up your Meta Quest 2 and manage your VR experiences.
Step 2: Turn on your Meta Quest 2 and position it in a well-lit area. The Quest 2 uses cameras to track your movements in the virtual world, so make sure there is enough light for the cameras to function properly.
Step 3: Put on your Quest 2 headset and navigate to the settings menu. From there, select “Device” and then “Bluetooth.”
Step 4: Turn on Bluetooth pairing mode by selecting “Pair New Device.” You will see a message that says “Pairing Mode Active.”
Step 5: On your phone, open the Meta app and ensure that your phone’s Bluetooth is turned on. From the app’s homepage, select the “Devices” tab.
Step 6: Select “Add New Device” and then select “Meta Quest 2” from the list of available devices. Your phone will now attempt to pair with your Quest 2.
Step 7: Once your phone and Quest 2 are paired, you will be prompted to grant the Meta app access to your phone’s notifications. This will allow you to receive notifications from your phone while in VR mode.
Step 8: Congratulations! Your Meta Quest 2 is now paired with your phone. You can now use your phone as a remote control to navigate your VR experiences, receive notifications while in VR mode, and even cast your VR experiences to your phone or TV.
Pairing your Meta Quest 2 to your phone is a simple process that will enhance your VR experience. Now that you know how to pair your Quest 2, you can enjoy all of the features and capabilities that come with this innovative headset. Happy VR’ing!


