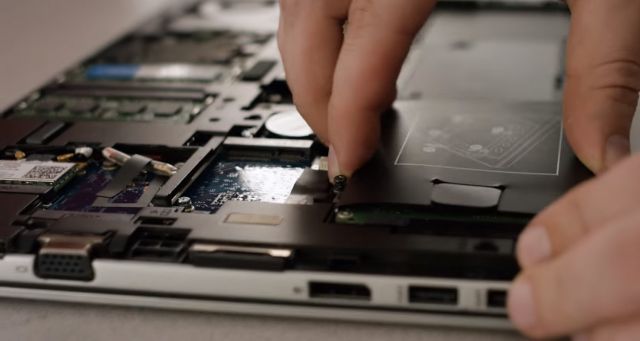
How to Install an SSD in Your Laptop

Solid-state drives (SSDs) are becoming increasingly popular when it comes to improving the performance of a laptop. Compared to traditional hard drives, SSDs are faster, more durable, and consume less power. If you want to upgrade your laptop by installing an SSD but do not know where to start, do not worry. This guide will walk you through the installation process in easy-to-follow steps.
Step 1: Choose the Right SSD
Before purchasing an SSD, you need to ensure that it is compatible with your laptop. Check the type of drive connector your laptop supports. Two of the most common types are Serial ATA (SATA) and mSATA. Once you know what type of SSD your laptop needs, you can then determine the storage capacity you need. If you only want to speed up boot and program load times, a smaller drive (256GB or lower) will suffice. However, if you need to store large files like videos and photos, a larger drive is recommended (512GB or above).
Step 2: Gather Tools
You will need a few tools to open the laptop and install the SSD. They include a screwdriver and an antistatic wristband or mat. The antistatic device prevents any static electricity from harming your laptop while you work on it.
Step 3: Backup Your Data
It is always a good idea to backup your data before opening up your laptop. This ensures that if something goes wrong during the installation, you can still access and restore your data. You can use external hard drives or cloud storage for this process.
Step 4: Open the Laptop
Turn off the laptop and disconnect it from the power source. Remove the battery and any peripherals like USB drives, external hard drives, and power cables. Then, use the screwdriver to remove the screws that hold the cover or panel that houses the hard drive. Depending on the make and model of your laptop, these screws may be located at the bottom, back or side of the laptop.
Step 5: Remove the Hard Drive
Once you have access to the hard drive, you can remove it by unscrewing the screws or gently pulling it out of its socket. If the hard drive is hard-wired, be careful not to damage any other components while you remove it.
Step 6: Install the SSD
Carefully insert the new SSD by sliding it into its socket and screwing it in place using the screws provided. Take note of the orientation of the drive as it should fit in a specific way. After installing the SSD, you can now reinstall the cover or panel that holds the hard drive.
Step 7: Reinstall the Operating System
Once the SSD is installed, you need to install the operating system (OS). This can be done by using a recovery disk, a system image, or by downloading the OS from the manufacturer’s website. If you do not have any OS installation disks or images, you can opt to install a free operating system like Linux.
Step 8: Restore Your Data
After installing the operating system, restore your files and folders from the backup you made earlier. Make sure to check that everything is working correctly.
In conclusion, installing an SSD in your laptop is a simple process that can significantly improve its performance. If you follow the above steps, you should have no problem upgrading your laptop. Remember to take your time, be careful, and backup your data before you start the installation process.


