How to Insert a Cover Page in a Word for Mac Document

Adding a cover page to a document gives it a professional and polished look. Cover pages typically include important information about the document, such as the title, author, and date. This article will guide you through the process of adding a cover page in a Word for Mac document.
Step 1: Open a new document in Word for Mac
To insert a cover page, you first need to open a new Word document on your Mac. Click on the Word icon in the dock and select New Document.
Step 2: Open the Cover Page Gallery
In the top menu bar, click on the Insert tab and then click on the Cover Page button. This will open the Cover Page Gallery.
Step 3: Choose a Cover Page Template
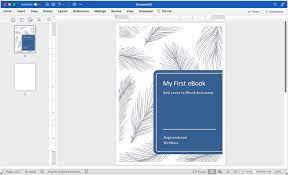
The Cover Page Gallery contains several pre-designed cover page templates to choose from. You can browse through the templates by clicking on each one in the gallery.
Once you’ve chosen a template, simply click on it to insert it into your document. The cover page will appear at the beginning of the document.
Step 4: Customize the Cover Page
Now that you’ve inserted a cover page, you can customize it to fit your needs. To add text to the cover page, simply click on the text boxes and type in your desired text. You can also resize or move the text boxes by clicking and dragging them.
To change the font, font size, or color of the text, select the text box and use the options in the formatting toolbar.
Step 5: Save the Document
After customizing your cover page, be sure to save your document to keep the changes. Click on File in the top menu bar and select Save or Save As to save the document.
In conclusion, adding a cover page to a Word for Mac document can enhance its appearance and organization. By following these simple steps, you can create a professional-looking cover page that will impress your readers.


