How to Erase a Hard Drive Using DBAN

As technology advances, we may find ourselves in need of erasing all the data on our hard drive. Whether it’s for security purposes or simply to repurpose the drive for a new use, we must know the proper steps to take. One effective method of erasing a hard drive is using Darik’s Boot and Nuke (DBAN) software. In this article, we will go over how to properly use DBAN to erase a hard drive.
Before we start, it is important to note that DBAN will erase all the data on the selected hard drive, making it impossible to recover any of the data after the process is complete. Additionally, we want to ensure we are following safety precautions, as the process of erasing data can generate heat and electrical charges. DBAN is also not recommended for use on solid-state drives (SSDs).
Here are the steps to erase a hard drive using DBAN:
Step 1: Create a Bootable Disk
We must first create a bootable disk with DBAN installed. We can download DBAN from their official website and follow the instructions provided to create a bootable disk. We can use a USB drive or a CD/DVD for this.
Step 2: Boot From the Disk
We must configure our computer to boot from the disk. This process differs depending on the computer’s manufacturer and model. Generally, we can enter the BIOS menu during startup by pressing F2 or F12 and changing the boot order to ensure the disk is the first boot option.
Step 3: Select the Hard Drive to Erase
Once DBAN loads, we will see a list of detected hard drives. We must carefully select the hard drive we want to erase using the arrow keys on our keyboard.
Step 4: Choose the Wipe Method
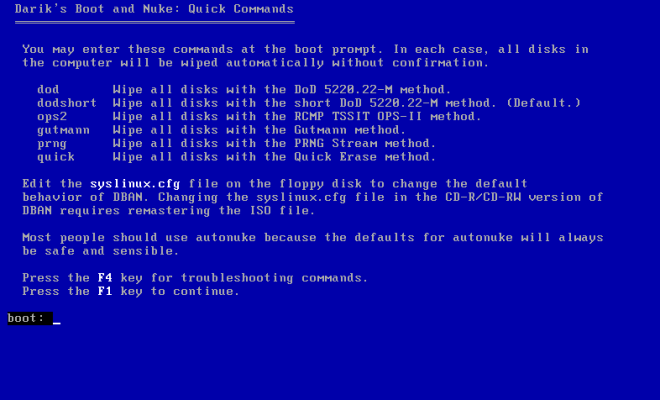
DBAN offers several wiping methods, including single pass, DoD Short, and DoD 5220.22-M. It’s important to decide which method is suitable for our needs. A single pass should be sufficient for most users but if we are dealing with highly sensitive data, we may want to choose a more thorough method.
Step 5: Start the Wipe
After selecting the wiping method, we can begin the process by following the prompts on DBAN’s menu. Please note that this process can take several hours to complete, depending on the size of the hard drive and the selected wiping method.
Step 6: Verify the Wipe
Once the process is complete, we must verify that the hard drive is completely wiped. DBAN will provide a verification prompt, and we can also view the results log to ensure the process is successful.
In conclusion, using DBAN is an effective way to erase a hard drive. However, we must take the necessary precautions when erasing data and ensure that we are using the appropriate method for our needs. By following the steps outlined above, we can confidently erase our hard drive and repurpose or dispose of it safely.


