How to Edit a Scanned Document on Your PC

Scanning documents is a convenient way of digitizing them, but they often come out as images which you cannot edit. Fortunately, there are multiple ways of editing a scanned document on your PC. In this article, we will guide you on those different methods.
Method 1: Using Microsoft Word
Step 1: Open the Scanned Document in Microsoft Word
Open Microsoft Word on your PC and then click on ‘Insert’ from the top toolbar. From there, click on ‘Pictures’, then ‘From File’, and select the scanned document image from your file directory.
Step 2: Edit the Text with OCR Technology
With the scanned document in Microsoft Word, you can now use the OCR (Optical Character Recognition) feature to recognize the text in the document. In Word 2010 or later, click on the ‘File’ menu, select ‘Options’, click on the ‘Proofing’ tab, and then click on the ‘AutoCorrect Options’ button. In the AutoCorrect tab, check ‘Replace text as you type’ and check ‘Use mathematical recognition’ for better recognition of math symbols. Now, you can click on ‘OK’ and close the window. Afterward, the text will be editable.
Step 3: Correct Errors in the Document
After recognizing the text, Microsoft Word may have made some mistakes. Correct the errors as necessary. You can manually make changes to the text using the backspace and delete keys, or right-click on a word that has been incorrectly recognized and select the correct one from the list.
Method 2: Using Adobe Acrobat
Step 1: Open the Scanned Document in Adobe Acrobat
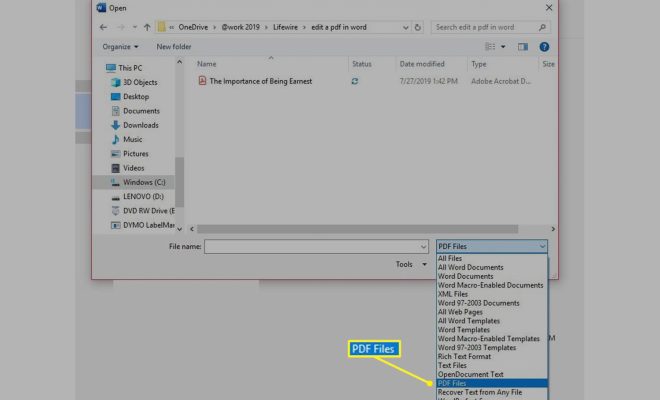
After installing Adobe Acrobat on your PC, open the scanned document image. Then, from the toolbar, click on ‘File’ and choose ‘Save As’. Choose ‘PDF’ as the file type and then save the file. The scanned document will now be in PDF format.
Step 2: Edit the Text with OCR Technology
In Adobe Acrobat, select the ‘Edit PDF’ tool. Then, click on the text you want to edit, and make your changes. You can also add images, or markups such as highlights and underlines. When you’re done, save the changes.
Method 3: Using an Online OCR Tool
Step 1: Upload the Scanned Document
Go to your preferred online OCR tool. There are various options available such as OCR.Space, Online-Convert, and FreeOCR. Choose one and then upload the scanned document.
Step 2: Edit the Recognized Text
After the OCR tool has recognized the text in the scanned document, you can now edit it. Typically, these online OCR tools provide a text editor to make corrections and changes as necessary.
In conclusion, these are different methods to edit a scanned document on your PC. With these methods, you can transform your scanned documents into editable and searchable text documents. Choose the method that best suits your needs and requirements, and then follow the instructions to get started!


