How to Create a Virtual Machine in Windows 10

A virtual machine is a software that emulates a computer within your existing operating system. Using virtual machines, you can run multiple operating systems on a single computer at the same time. This is useful for developers or anyone who needs to test and develop software, as they can do so while isolating their work environment from their personal computer.
In this article, we’ll guide you through how to create a virtual machine in Windows 10.
Step 1: Check Your System Requirements
Before you begin, you need to confirm that your computer meets the minimum requirements to run a virtual machine. These requirements include having enough RAM and disk space to host the virtual machine. In general, you should have at least 4GB of RAM and 20GB of free disk space for each virtual machine you create.
Step 2: Download and Install Virtual Machine Software
There are many virtual machine software options available, including VirtualBox, VMware, and Hyper-V. For this tutorial, we will use VirtualBox because it’s free and easy to use.
Download VirtualBox and install it on your computer. Simply double-click on the installer, and follow the prompts to complete the installation.
Step 3: Create a New Virtual Machine
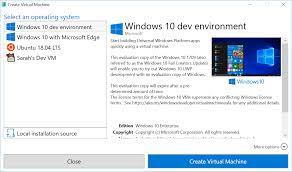
Open the VirtualBox software and click the “New” button to create a new virtual machine. This will open up the New Virtual Machine Wizard.
Enter a name for your virtual machine and select the operating system you want to install. For example, you can choose to install Windows 10, Linux, or Mac OS X.
Click “Next” to proceed.
Step 4: Configure the Virtual Machine Settings
In the next window, you can configure various settings for your virtual machine. The defaults are usually fine, but you can adjust them if you need to change the amount of RAM or virtual hard disk size.
Once you have configured these settings, click “Create” to create the virtual machine.
Step 5: Install the Operating System
With your virtual machine created, it’s time to install the operating system. Before you start, make sure you have a copy of the operating system on hand.
In VirtualBox, select your new virtual machine and click the “Start” button. This will launch the virtual machine, and you should see the operating system installation screen.
Follow the prompts to install the operating system as you would on a normal computer.
Step 6: Install Virtual Machine Additions
Virtual machine additions are additional software packages that improve the functionality of your virtual machine. These include better graphics support, shared folders, and improved network performance.
To install the virtual machine additions, select the virtual machine in VirtualBox and click the “Devices” menu. Choose “Insert Guest Additions CD Image” and follow the prompts to complete the installation.
In Conclusion
Creating a virtual machine in Windows 10 is an excellent way to test software and run multiple operating systems on a single computer. With the help of virtual machine software like VirtualBox, the process is quick and easy. Follow these steps, and you’ll be up and running in no time!


