How to Cartoonify Your Photos With GIMP

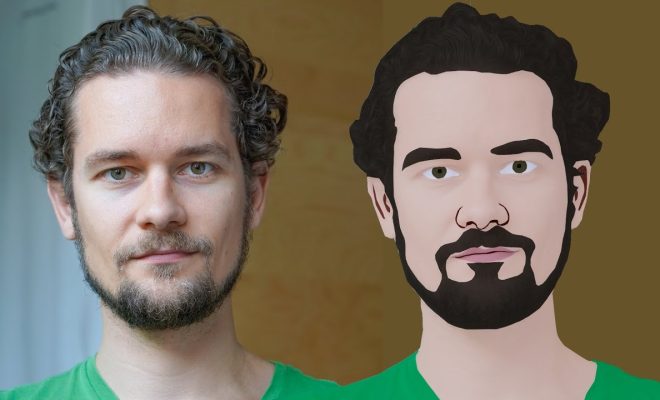
If you love cartoons and want to add a touch of that playful element to your photos, now you can do it yourself! In this article, we’ll show you how to cartoonify your photos with GIMP.
GIMP, or GNU Image Manipulation Program, is a free and open-source image editor. It offers powerful tools for editing and creating images, and it’s a popular choice for graphic designers and photographers. With GIMP, you can apply various effects to your photos, including cartoonify effects.
Here are the steps to cartoonify your photos with GIMP:
Step 1: Open Your Photo
The first step is to open the photo you want to cartoonify in GIMP. To do this, click on “File” in the menu bar, then “Open”. Locate your photo and select it, then click “Open”.
Step 2: Duplicate the Layer
The next step is to duplicate the layer of your photo. This allows you to make changes without affecting the original photo. To do this, right-click on the layer in the “Layers” panel on the right side of the screen, then choose “Duplicate Layer”.
Step 3: Apply the Cartoonify Effect
Now it’s time to apply the cartoonify effect to the duplicated layer. There are various ways you can do this, but one of the simplest methods is by using the “Artistic” filter. To do this, go to “Filters” in the menu bar, then “Artistic”, then “Cartoon”.
You can adjust the parameters of the filter to your liking. For example, you can adjust the edge thickness, smoothness, and black/white threshold. Experiment with the settings until you get the desired effect.
Step 4: Merge the Layers
Once you’re happy with the cartoonify effect, it’s time to merge the layers. To do this, right-click on the duplicated layer in the “Layers” panel, then choose “Merge Down”. This combines the duplicated layer with the original layer, giving you a single layer with the cartoonified photo.
Step 5: Save Your Cartoonified Photo
Finally, it’s time to save your cartoonified photo. To do this, click on “File” in the menu bar, then “Export As”. Choose a file format (such as JPEG or PNG), and give your file a name. Click “Export” to save your photo.
Conclusion
Cartoonifying your photos with GIMP is a fun and easy way to add a touch of playful style to your images. With just a few simple steps, you can transform your photos into cartoon-like illustrations. Experiment with different settings and filters to see what works best for your photos. Happy cartoonifying!


