How to Add A Picture To Your Gmail Profile

Adding a picture to your Gmail profile is a great way to personalize your account and make it easier for others to recognize you. It’s a simple process that can be done in just a few steps.
Here’s how to add a picture to your Gmail profile:
Step 1: Sign in to your Gmail account
Firstly, you need to sign in to your Gmail account. You can do this by going to the Gmail website and entering your email address and password.
Step 2: Click on the profile picture icon
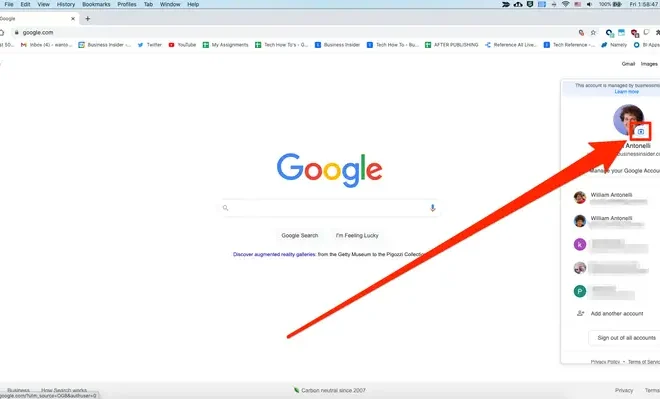
Once you are signed in to your Gmail account, you will see your inbox. In the top right-hand corner of the screen, you will see a circle with your current profile picture or a default icon. Click on this icon to open the profile menu.
Step 3: Click on “Change”
In the profile menu, click on the “Change” button located under your current profile picture. This will bring up a new window where you can upload a new picture.
Step 4: Choose a picture to upload
In the new window, you can choose to upload a picture from your computer or take a new picture using your webcam. Click on the “Select a picture” button to choose a picture from your computer. You can also drag and drop a picture from your computer into the upload window.
Step 5: Crop your picture (optional)
After you have selected your picture, you can crop it to fit the profile picture dimensions. Use the crop tool to select the area of the picture that you want to use for your profile picture.
Step 6: Save your changes
Once you have chosen your picture and cropped it (if necessary), click on the “Set as profile photo” button to save your changes. Your new profile picture will now be visible in Gmail and other Google services.
In conclusion, adding a picture to your Gmail profile is a quick and easy process that can help personalize your account and make it easier for others to recognize you. By following these simple steps, you can upload a new profile picture in just a few minutes.


