9 Ways to Open Task Scheduler in Windows 11

Task Scheduler is a built-in tool in Windows 11 that schedules tasks or programs to run automatically at a specific time or on a specific trigger. It can be used to automate routine tasks or even run complex workflows. In this article, we will discuss 9 ways to open Task Scheduler in Windows 11.
1. Using the Start Menu
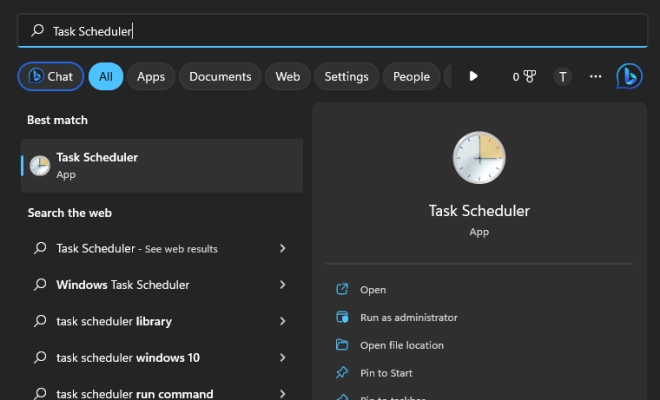
The easiest and quickest way to open Task Scheduler in Windows 11 is to use the Start Menu. Click on the Start button, type “Task Scheduler” in the search box, and click on the Task Scheduler app that appears in the search results.
2. Using the Run Dialog Box
Another way to open Task Scheduler in Windows 11 is to use the Run dialog box. Press the Windows key + R to open the Run dialog box, type “taskschd.msc” and press Enter.
3. Using the Command Prompt
If you prefer using the Command Prompt, you can open Task Scheduler by launching the Command Prompt and typing “taskschd.msc” and pressing Enter.
4. Using Windows PowerShell
If you’re a fan of PowerShell, you can use it to open Task Scheduler. Launch Windows PowerShell and type “taskschd.msc” and press Enter.
5. Using Windows Explorer
You can also open Task Scheduler by navigating to the following directory in Windows Explorer: “C:\Windows\System32\Tasks”. Double-click on the “taskschd.msc” file to launch Task Scheduler.
6. Using the Control Panel
Task Scheduler can also be accessed from the Control Panel in Windows 11. Click on the Start button, type “Control Panel” in the search box, and open the Control Panel. Click on the “System and Security” option and then click on “Administrative Tools”. Finally, click on “Task Scheduler” to open it.
7. Using the Windows Administrative Tools Folder
Windows 11 has a folder called “Administrative Tools” that contains Task Scheduler. To open it, click on the Start button, type “Administrative Tools” in the search box, and open the folder. Finally, click on “Task Scheduler” to open it.
8. Using the Windows Settings App
Task Scheduler can also be accessed through the Windows Settings app. Click on the Start button, click on “Settings”, and then click on “Apps”. Click on “Apps & features”, and then click on the “Manage optional features” link. Finally, click on “Add a feature”, find Task Scheduler in the list, and click on the “Install” button to add it to Windows.
9. Pinning Task Scheduler to the Taskbar
If you frequently use Task Scheduler, you can pin it to the taskbar for quick access. Open Task Scheduler using one of the above methods and then right-click on the Task Scheduler icon on the taskbar. Click on “Pin to taskbar” to add it to the taskbar.
In conclusion, Task Scheduler is a powerful tool that can automate tasks and save time for Windows 11 users. By using any of the 9 methods discussed in this article, users can easily open Task Scheduler and start scheduling tasks.


