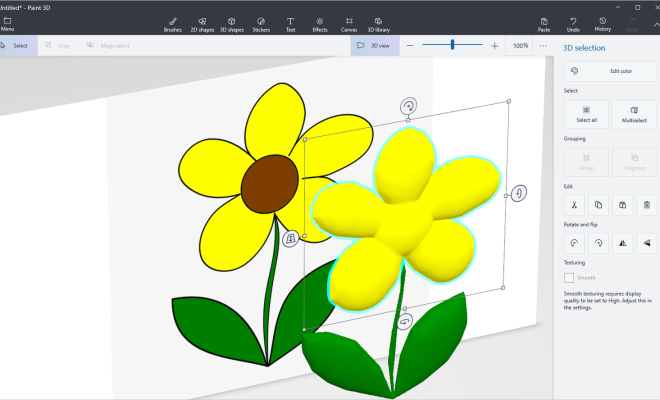
Turn a 2D Drawing Into 3D Art in Paint 3D

Creating 3D art has never been easier with Paint 3D. This innovative software allows you to take your 2D
drawings to the next level by turning them into 3D models. Whether you’re a professional artist or just starting out, you can produce stunning 3D artwork quickly and easily. In this article, we’ll take a look at how to turn a 2D drawing into 3D art in Paint 3D.
Step 1: Choose your 2D drawing
The first step is to choose the 2D drawing that you want to turn into 3D art. This could be a sketch that you’ve scanned, a drawing you’ve created on your computer, or even a photograph. Whatever the source of your image, it must be saved in a format that Paint 3D can recognize, such as BMP, JPEG, PNG, and GIF.
Step 2: Open Paint 3D and import your 2D drawing
Once you have your 2D drawing, open Paint 3D, and click on the “Open” button in the top left corner of the screen. Select your 2D drawing from your files, and it will open in Paint 3D.
Step 3: Add a 3D shape to your drawing
Now it’s time to turn your 2D drawing into 3D art. Click on the “3D shapes” button in the toolbar, and select the shape that you’d like to add to your drawing. You can choose from a range of shapes, including cubes, spheres, cones, and cylinders.
Once you’ve chosen your shape, click and drag it onto your 2D drawing. You’ll see that the shape will automatically apply to your drawing, creating a 3D version of it. Adjust the size and position of the 3D shape until it looks just right.
Step 4: Adjust your 3D object
Once you’ve added a 3D shape to your 2D drawing, you can further adjust it by using the “Rotation” and “Resize” tools. These tools are located in the toolbar on the right-hand side of the screen. You can use the “Rotation” tool to rotate your 3D object in any direction, and the “Resize” tool to make it bigger or smaller.
Step 5: Customize your 3D object
Paint 3D offers a range of tools for customizing your 3D object. You can use the “Stickers” tool to add images to your 3D object, the “Brushes” tool to add paint effects, and the “Effects” tool to add lighting and shadows.
Step 6: Save and share your 3D art
Once you’ve finished creating your 3D art, it’s time to save and share it with the world. To save your 3D art, click on the “Menu” button in the top left corner of the screen and select “Save as.” You can choose to save your 3D art in a range of formats, including PNG, JPEG, and 3MF.
Conclusion
Turning a 2D drawing into 3D art may seem like a daunting task, but with Paint 3D, it’s easier than ever. By following the steps outlined in this article, you can create stunning 3D art from your 2D drawings in no time. Whether you’re a professional artist or just starting out, Paint 3D is a powerful tool that can take your art to the next level.


