How to Use a Mouse With Your iPhone
As an iPhone user, you’re likely accustomed to using the touchscreen interface of your device for navigation and interaction. But did you know that you can also connect a mouse to your iPhone for added functionality and convenience?
Here’s how to use a mouse with your iPhone.
Step 1: Ensure your iPhone is running iOS 13 or later
The ability to use a mouse on your iPhone is a feature that was introduced in iOS 13. If you’re not already running this version of iOS, you’ll need to update your device before you can use a mouse.
To check your iOS version, go to Settings > General > About and look for the “Software Version” number. If you’re not on iOS 13 or later, go to Settings > General > Software Update to download and install the latest version.
Step 2: Connect your mouse to your iPhone
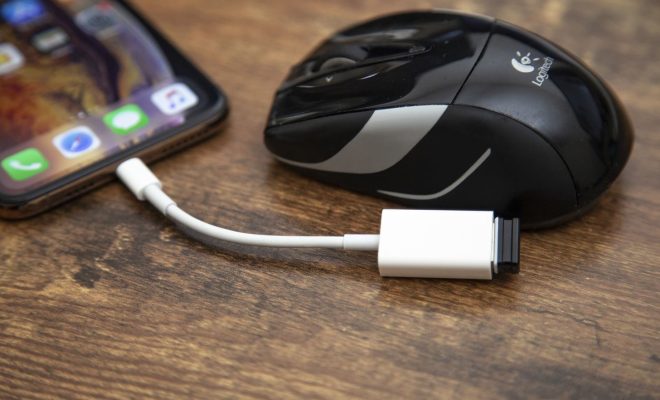
To connect your mouse to your iPhone, you’ll need a Lightning-to-USB adapter. This adapter will allow you to plug your mouse’s USB cable into your iPhone’s Lightning port.
Simply plug the Lightning-to-USB adapter into your iPhone’s Lightning port, then plug your mouse into the adapter’s USB port.
Step 3: Use your mouse on your iPhone
Once your mouse is connected to your iPhone, you can use it just like you would on a computer. Move the cursor by moving the mouse, and click by pressing the left mouse button.
You can also customize your mouse settings by going to Settings > Accessibility > Touch > AssistiveTouch. From there, you can adjust the tracking speed and customize the button functions.
Step 4: Disconnect your mouse when you’re done
When you’re finished using your mouse with your iPhone, be sure to disconnect it properly. Simply unplug the mouse from the Lightning-to-USB adapter, then unplug the adapter from your iPhone’s Lightning port.
Using a mouse with your iPhone can be a game-changer if you’re looking for a more precise and responsive way to interact with your device. Follow these simple steps to get started, and enjoy a new level of control over your iPhone.