How to Replace Switches on Mechanical Keyboard

Mechanical keyboards are the preferred choice for many enthusiastic typists and gamers who demand durability, tactile feedback, and customization options. However, like any other technology, mechanical keyboards can wear out or malfunction over time. One of the most common issues is switch failure, which can be caused by debris, oxidation, or physical damage. Fortunately, replacing switches on a mechanical keyboard can be a straightforward and rewarding process, even for beginners. In this article, we will provide a step-by-step guide on how to replace switches on a mechanical keyboard.
Step 1: Gather your tools and switches
Before starting the replacement process, you will need some basic tools and materials. These include a screwdriver, a soldering iron, a desoldering pump or wick, a pair of tweezers, and replacement switches. Make sure to choose switches that are compatible with your keyboard’s model and layout, and measure their dimensions and pin spacing to ensure a snug fit. You can find replacement switches on online marketplaces or from reputable manufacturers such as Cherry MX, Kailh, Gateron, or Outemu.
Step 2: Remove the keycaps and screws
To access the switches, you need to remove the keycaps and screws that hold the keyboard together. Use a keycap puller or a small tool like a paper clip to gently lift off each keycap, starting from the corners and working your way towards the center. Be careful not to damage or bend the key stems, which can affect the typing experience. Once you have removed all the keycaps, flip the keyboard over and locate the screws that hold the top plate or the PCB (printed circuit board) to the bottom plate or the case. Use a screwdriver to unscrew each screw, but keep them organized and labeled to avoid confusion later.
Step 3: Access the switches and desolder them
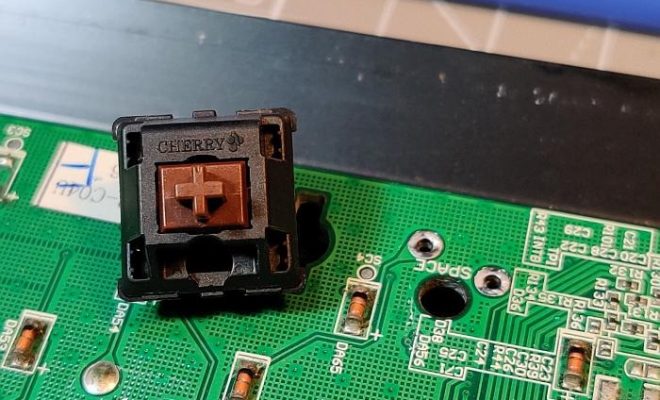
Once you have removed the top plate or the PCB, you should be able to access the switches from the underside. Depending on the keyboard’s design, some switches may be mounted on a plate, while others may be soldered directly to the PCB. In either case, you need to desolder the old switches to remove them. Heat up your soldering iron and touch the tip to the solder joints of each switch, using a desoldering pump or wick to suck up the melted solder. Be careful not to damage the PCB or the switch pins, and use a pair of tweezers to gently pull out the old switch once the pins are free.
Step 4: Install the replacement switches
Once you have removed all the old switches, you can proceed to install the replacement switches. Make sure to align them properly with the plate or the PCB, and gently push them in until they click into place. Be careful not to bend or break the switch pins, and ensure that the switches are level and flush with the plate or the PCB. If necessary, you can test each switch by pressing it down and observing whether the stem registers the keystroke.
Step 5: Solder the replacement switches
Once you have installed all the replacement switches, it’s time to solder them in place. Apply a small amount of solder to each switch pin and its corresponding pad on the PCB, using your soldering iron and solder wire. Ensure that the solder joints are shiny and smooth, and that there are no bridges or cold joints that can cause connectivity issues. Be patient and precise, and take breaks if necessary to avoid fatigue or overheating.
Step 6: Reassemble the keyboard
Once you have soldered all the replacement switches, you can reassemble the keyboard by reversing the steps you took in disassembly. Screw the top plate or the PCB back onto the bottom plate or the case, and tighten the screws evenly and snugly. Replace the keycaps by aligning each stem with its switch and pressing down gently until it clicks into place. Test each key by typing various characters and observing whether they register correctly.
Congratulations! You have successfully replaced the switches on your mechanical keyboard. With the right tools and technique, this process can be enjoyable and satisfying, and can breathe new life into an old or faulty keyboard. Remember to take proper precautions when handling soldering irons and other tools, and to seek help if you encounter any difficulties or doubts. Happy typing!


