How to Remove Labels from Bottles and Jars: A Comprehensive Guide
Introduction:
Reusing bottles and jars can be an eco-friendly and cost-effective solution for storage, decoration, or DIY projects. However, before upcycling these items, you often need to remove their labels. This article will outline several methods to effectively remove labels from bottles and jars, leaving them ready for your next creative endeavor.
Method 1: Warm Soapy Water
Step 1: Fill a basin or sink with warm water and add a few squirts of dishwashing detergent.
Step 2: Submerge the bottle or jar in the soapy water, ensuring the label is completely soaked.
Allow it to sit for at least 30 minutes.
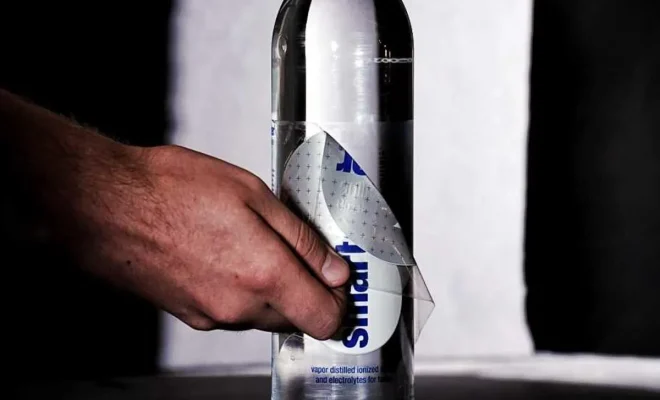
Step 3: After soaking, gently peel off the label using your fingers or a plastic scraper to avoid scratching the surface of the glass or plastic. If there is still adhesive residue on the container, continue to step 4.
Step 4: Use a cloth or sponge dipped in soapy water to scrub away any remaining residue. Rinse and dry the bottle or jar.
Method 2: Rubbing Alcohol or Acetone-Based Nail Polish Remover
Step 1: Apply rubbing alcohol or acetone-based nail polish remover to a cotton ball or cloth.
Step 2: Rub the soaked cotton ball or cloth over the label until it begins to loosen.
Step 3: Peel off the label carefully using your fingers or a plastic scraper. If there is adhesive residue left behind, continue with step 4.
Step 4: Apply more rubbing alcohol or nail polish remover to a clean cotton ball or cloth, and gently rub away any remaining adhesive. Rinse and dry the bottle or jar.
Method 3: Baking Soda & Oil Mixture
Step 1: In a small bowl, mix equal parts baking soda and cooking oil (vegetable oil, olive oil, or coconut oil will work) to form a paste.
Step 2: Apply the paste to the label and let it sit for at least 15 minutes.
Step 3: After allowing the paste to work on the label, use a plastic scraper or your fingers to peel off the label.
Step 4: If any adhesive residue remains, scrub it away gently using a cloth dipped in warm, soapy water. Rinse and dry the bottle or jar.
Method 4: Hair Dryer
Step 1: Plug in a hairdryer and set it to a medium-to-high heat setting.
Step 2: Hold the hairdryer around 4-6 inches away from the label and direct hot air onto it. Move the hairdryer back and forth along the entirety of the label for about a minute until it heats up.
Step 3: Carefully peel off the loosened label using your fingers or a plastic scraper.
Step 4: If there is any remaining adhesive residue, apply rubbing alcohol or acetone-based nail polish remover (as described in Method 2) to remove it. Rinse and dry the bottle or jar.
Conclusion:
Whether you’re upcycling bottles and jars for storage, crafting, or decorating purposes, removing labels is an essential step in repurposing these items. Experiment with these methods to determine which works best for your specific needs, leaving your bottles and jars ready for their new life.