How to Print Photos Directly off a Camera

Printing photos directly off a camera can be a convenient and easy way to get physical copies of your favorite snapshots. Here are the steps to follow to print photos directly off your camera:
Step 1: Check Your Camera
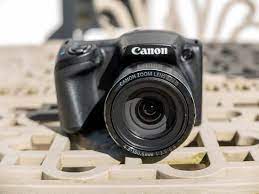
Firstly, check your camera to see if it has a direct printing feature. Most modern cameras have this feature, but if you are unsure, refer to your camera’s user manual.
Step 2: Connect Your Camera to a Printer
Once you have confirmed that your camera has a direct printing feature, connect your camera to a printer. Most cameras use a USB cable to connect to printers, but some cameras may use a different type of cable. Refer to your camera’s user manual for connection instructions.
Step 3: Select Photos to Print
Once your camera is connected to the printer, you can select the photos you want to print. Most cameras will display a list of photos on the camera screen, and you can select the photos you want to print using the camera’s controls.
Step 4: Adjust Print Settings
Before you print your photos, you may want to adjust the print settings. Most cameras will allow you to adjust the print size, print quality, and other settings. Refer to your camera’s user manual for instructions on how to adjust the print settings.
Step 5: Print Your Photos
Once you have selected your photos and adjusted the print settings, you can print your photos. Most cameras will have a print button or menu option that you can use to start the printing process.
Conclusion
Printing photos directly off a camera can be a quick and easy way to get physical copies of your favorite snapshots. By following these simple steps, you can print your photos directly off your camera in no time.


