How to Move the Taskbar in Windows 10

The taskbar in Windows 10 is an important part of the operating system as it provides easy access to commonly used apps, displays notifications, and more. It is an essential tool for anyone who uses Windows on a regular basis.
However, not everyone knows that you can actually move the taskbar around to suit your preferences. In this article, we’ll show you how to do just that.
Before you begin, note that moving the taskbar in Windows 10 is a simple process. However, you may want to customize the size and placement of the taskbar icons to ensure that the taskbar fits your needs. We recommend experimenting with different sizes and settings until you find the perfect fit.
Here’s how to move the taskbar in Windows 10:
Step 1: Right-click on any empty area of the taskbar.
Step 2: Ensure that the taskbar is unlocked. If it’s locked, you won’t be able to move it. If it’s unlocked, you’ll see a checkmark next to the “Lock the taskbar” option.
Step 3: Click and hold on an empty area of the taskbar.
Step 4: Drag the taskbar to any side of the screen that you prefer.
Step 5: Once the taskbar is in the desired position, let go of the mouse button.
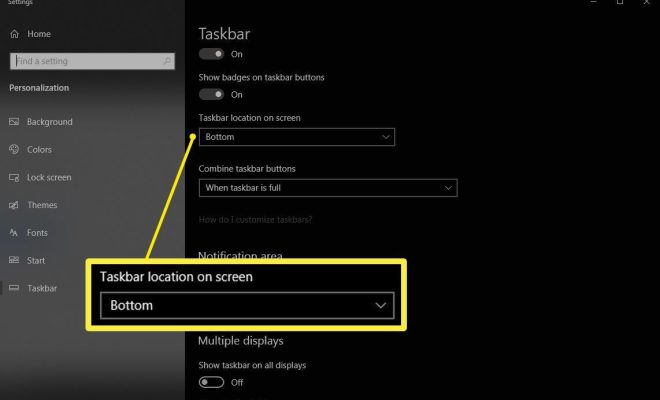
Step 6: If you want to make the taskbar smaller or bigger, right-click on an empty area, select “Taskbar settings,” and then choose “Taskbar size” from the menu. Here, you can adjust the size of the taskbar.
Step 7: You can also choose to hide the taskbar or make it automatically hide when you’re not using it. To do this, right-click on an empty space on the taskbar and select “Taskbar settings.” Under the “Taskbar” tab, toggle
“Automatically hide the taskbar in desktop mode” or “Automatically hide the taskbar in tablet mode” on or off.
In conclusion, moving the taskbar in Windows 10 is a quick and easy process that can help you personalize your experience with the operating system. By following the steps outlined above, you can easily move the taskbar to any side of the screen and adjust its size to suit your preferences


