How to mount your smartphone on a tripod (DIY)
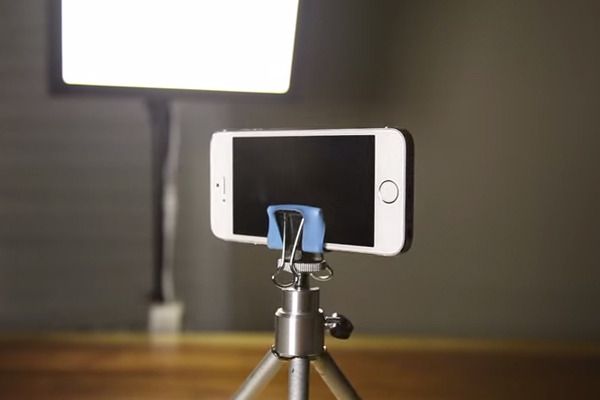
In the era of smartphones, capturing high-quality photos and videos has never been easier. But to take your photography and videography skills to the next level, a tripod can be an essential piece of equipment. This guide will teach you an easy and budget-friendly DIY method to mount your smartphone on a tripod without purchasing special adapters.
Materials needed:
1. Smartphone
2. Tripod
3. Rubber band (large enough to wrap around the phone)
4. Pen or pencil with a clip
Step-by-step guide:
1. Prepare your materials: Ensure that you have the necessary items listed above before you start this project. Choose a sturdy tripod that has adjustable legs for ease of use and stability.
2. Extend the tripod’s legs fully: Setting up your tripod is important for its stability and usability during your photo or video shoot. Extend the legs and make sure they are locked into place so that the tripod is secure.
3. Attach the pen or pencil with a clip to the tripod: Position the pen or pencil horizontally against one of the tripod’s top brackets, with the clip facing towards where your smartphone will be placed. Securely fasten the pen or pencil to the bracket using one or more rubber bands wrapped around both objects, putting tension only on the ends as much as possible.
4. Position your smartphone: Place your phone in landscape mode (horizontally) with its top edge resting against the clip of the pen or pencil. The bottom edge of your smartphone should be touching one of the other tripod brackets for additional support.
5. Secure your smartphone with rubber bands: Take one end of another rubber band and loop it around one side of your phone and under the part of the first band securing the pen/pencil, then stretch it across to loop onto the other side of your phone to hold it in place firmly.
6. Test for stability: Gently shake the tripod to ensure your phone is securely attached to the tripod and doesn’t move easily. Adjust the tightness of the rubber bands as needed if your phone seems wobbly or too loose.
7. Adjust the tripod for optimal shooting: Now that your smartphone is mounted on your tripod, you can adjust the legs and level of the tripod to achieve the desired angles and perspectives for your photos and videos.
Congratulations! You’ve now successfully mounted your smartphone on a tripod using a simple DIY method. With this setup, you can capture stable images and videos, experiment with time-lapse photography, or even use it for hands-free video calls and conference meetings. Happy shooting!


