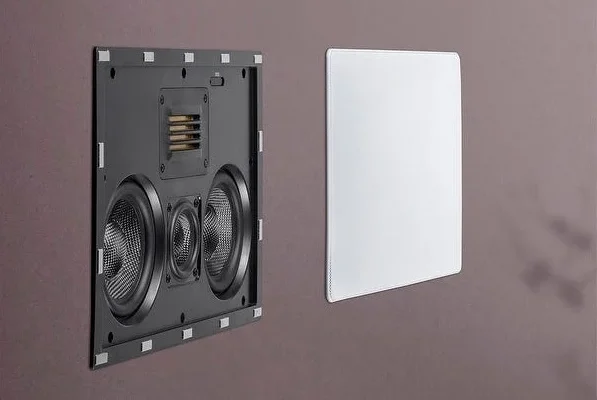
How to Install In-Wall Stereo Speakers

In-wall stereo speakers are the perfect way to enhance the sound system in your home or office and create a cinematic experience. Installing in-wall speakers is a great way to free up some floor space and get your speakers up off the floor. In-wall speakers can be placed in the ceiling or walls and blend seamlessly into the decor of your room.
Here’s a step-by-step guide on how to install in-wall stereo speakers:
1) Choose your location and the size of the speakers:
First, decide where you want to install the speakers. The ideal placement for in-wall speakers is on the opposite walls in the room, as this offers the best sound quality. You should also choose the right size speakers for your room. Smaller rooms may not require bigger speakers, but a larger room or home theatre may require larger speakers for optimal sound quality.
2) Cut a hole and install the mounting bracket:
Cut a hole in the wall or ceiling where you would like to place the speakers. You can use a drywall saw or reciprocating saw to cut the hole. After cutting the hole, place the mounting bracket inside and tighten the screws to secure it. Make sure the mounting bracket is level and centered before tightening the screws.
3) Install the speaker wires:
Thread the speaker wires through the hole in the mounting bracket. Make sure you have enough wire to connect the speakers to the receiver or amplifier. If the wires are not long enough, you can use a splicing kit to join them together. Then, fasten the wires to the mounting bracket using the wire clips.
4) Attach the speaker to the mounting bracket:
Once the speaker wires are secure, it’s time to attach the speaker to the mounting bracket. Most in-wall speakers come with a grille that snaps onto the speaker and covers the mounting bracket. Snap the grille onto the speaker and make sure it sits flush with the wall.
5) Connect the speakers to the amplifier or receiver:
Connect the speaker wires to the amplifier or receiver. Connect the red wire to the red terminal, and the black wire to the black terminal. Then, plug in the speaker wire to the receiver or amplifier. Make sure the connections are tight so that no sound is lost.
6) Test the speakers:
Turn on your sound system and test the speakers. Play some music or a movie and listen to the sound quality from your newly installed in-wall speakers. Make any necessary adjustments to ensure the sound quality is optimal.
Conclusion:
Installing in-wall stereo speakers can be a fun and rewarding project that can improve your home or office’s sound quality. Follow these steps to install your in-wall speakers and enjoy the ultimate sound experience. Remember to be patient, take your time, and follow the instructions correctly to ensure a successful installation.


