How to Install HEVC and HEIC Codecs on Windows 11

Windows 11, the latest operating system from Microsoft, comes with support for a variety of multimedia formats, including HEVC (High Efficiency Video Coding) and HEIC (High Efficiency Image File Format). However, if you are having problems playing or viewing files that use these codecs, you may need to install additional software to extend the capabilities of your system.
In this guide, we’ll walk you through the steps of installing HEVC and HEIC codecs on Windows 11, so you can enjoy your favorite movies and images without any trouble.
Step 1: Check if Your System is Capable of HEVC and HEIC Support
Before we jump into the installation process, it’s important to check if your system is capable of playing and viewing HEVC and HEIC files. To do this, you can try opening a file that uses these codecs in a media player or image viewer on your computer.
If the file plays or opens without any issues, then your system is already equipped with the necessary codecs. However, if you encounter an error message or the file doesn’t load properly, then you need to install the codecs.
Step 2: Download and Install the Codecs
To install HEVC and HEIC codecs on your Windows 11 computer, you have two options: purchase them from the Windows Store or download them from a third-party source.
Option 1: Purchase from the Windows Store
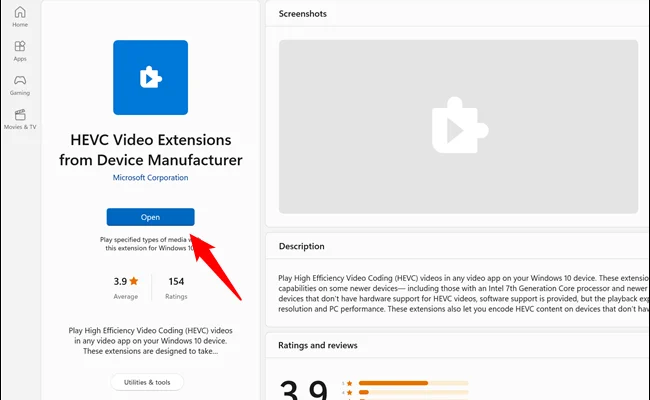
Open the Windows Store app on your system and search for “HEVC Video Extensions” and “HEIF Image Extensions”. Once you have found the relevant extensions, click “Install” to purchase and install them on your system. The cost of each extension is $0.99.
Option 2: Download from a Third-Party Source
If you prefer not to buy the codecs from the Windows Store or want to avoid using it altogether, you can download the codecs from a third-party website.
A popular option is the free VLC Media Player. It comes with built-in support for a wide variety of formats, including HEVC and HEIC. To download VLC Media Player, go to its official website and select the download option that corresponds to your system architecture.
Once the download is complete, run the installer and follow the instructions displayed on your screen to install the software. During the installation process, make sure to check the boxes for the HEVC and HEIF codecs in the “Choose Components” section.
Step 3: Test the Codecs
After you have installed the HEVC and HEIC codecs on your Windows 11 computer, it’s a good idea to test them by opening a file that uses these codecs. If the file plays or opens without any issues, then the installation was successful.
If not, you may need to restart your computer or try reinstalling the codecs to ensure they are correctly installed.
Conclusion
Installing HEVC and HEIC codecs on your Windows 11 computer is a straightforward process that can greatly enhance your multimedia experience. By following the steps outlined in this guide, you can ensure that you can play and view any files that use these codecs without any trouble.


