How to Install a Second SSD
Installing a second SSD can significantly boost your computer’s storage capacity and performance. Most modern motherboards feature multiple SATA ports, allowing for easy installation of additional storage devices. In this article, we will walk you through the steps to install a second SSD in your computer.
Step 1: Choose the Right SSD
The first thing you need to do is choose the right SSD. Look for an SSD that matches the form factor and interface of your computer. Most computers use a 2.5-inch SSD with SATA interface. However, some modern systems use newer M.2 SSDs or PCIe slots. Make sure you choose an SSD that fits your computer’s specifications.
Step 2: Backup Your Data
Before installing a new SSD, it’s important to back up all your important data. This will ensure that you don’t lose any important files in case anything goes wrong during the installation process.
Step 3: Power Off and Unplug Your Computer
Turn off your computer and unplug it from the power source. This will ensure that you don’t accidentally damage any internal components while installing the new SSD.
Step 4: Open Your Computer Case
Carefully open your computer case, making sure not to remove any important internal components. Consult your computer’s manual or look online for instructions on how to open your specific case.
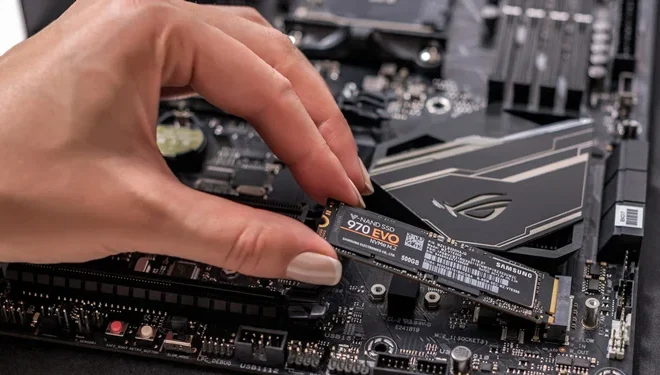
Step 5: Locate an Available SATA Port
Locate an available SATA port on your motherboard. Most motherboards will have multiple SATA ports available for additional storage devices. Keep in mind that some motherboards may require you to disable the on-board SATA port when installing a new SSD.
Step 6: Attach the SSD to the Mounting Bracket
Some computer cases will come with a mounting bracket for installing additional SSDs. If your computer case has a mounting bracket, attach your new SSD to the bracket using the screws provided.
Step 7: Connect the SSD to the SATA Port
Carefully connect the SSD to the available SATA port on your motherboard. Make sure the SSD is securely attached to the SATA port.
Step 8: Close Your Computer Case
Close your computer case and reconnect all cables and power sources. Make sure the case is properly secured.
Step 9: Power On Your Computer
Power on your computer and check to see if the new SSD is recognized by your system. If your system recognizes the SSD, you may need to format the drive before you can use it.
Installing a second SSD is a straightforward process that can greatly enhance your computer’s storage and performance capabilities. By following the steps outlined in this article, you can add another SSD to your system and enjoy increased storage and performance.