How to Create an Ad Hoc Network
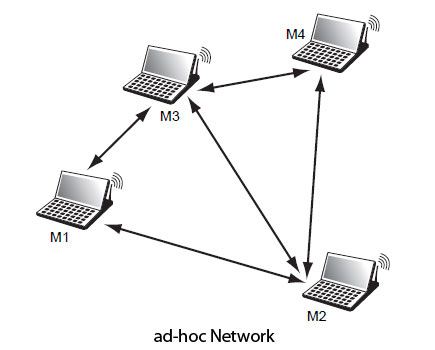
An ad hoc network is a type of wireless network that allows devices to connect directly to each other without the need for a central access point. This can be useful in situations where a traditional network is not available, such as in remote locations or during emergencies. In this article, we will show you how to create an ad hoc network on your Windows or Mac computer.
Creating an Ad Hoc Network on Windows
- 1. Open the Control Panel on your Windows computer.
- 2. Click on “Network and Sharing Center”.
- 3. Click on “Set up a new connection or network”.
- 4. Select “Set up a wireless ad hoc (computer-to-computer) network” and click “Next”.
- 5. Follow the prompts to name your network and set a security key.
- 6. Once you have finished, click “Turn on Internet Connection Sharing” if you want to share your internet connection with other devices on the network.
Creating an Ad Hoc Network on Mac
- 1. Click on the Apple logo in the upper left corner of your Mac’s screen.
- 2. Select “System Preferences”.
- 3. Click on “Sharing”.
- 4. Check the box next to “Internet Sharing”.
- 5. Choose “Wi-Fi” from the “Share your connection from” dropdown menu.
- 6. Select “Create Network” from the “To computers using” dropdown menu.
- 7. Enter a name and password for your network.
- 8. Click “OK” to create your ad hoc network.
Connecting to an Ad Hoc Network
Once you have created your ad hoc network, other devices can connect to it by searching for available Wi-Fi networks and selecting your network from the list. They will need to enter the password you set up during the network creation process.
Conclusion
Creating an ad hoc network can be a useful solution in situations where a traditional network is not available. By following the steps outlined in this article, you can quickly and easily create an ad hoc network on your Windows or Mac computer