How to create a system image in Windows 10

Introduction
Creating a system image in Windows 10 is an essential process for every user. A system image is a complete snapshot of your computer’s files, settings, and operating system at a particular point in time. It can be used to restore your computer to an earlier state or recover from system failures. In this article, we will walk you through the process of creating a system image in Windows 10.
Step 1: Prepare an External Drive
To create a system image in Windows 10, you will need an external hard drive or a large capacity USB stick with enough space to store the system image. Make sure that the external drive is formatted using the NTFS file system.
Step 2: Open the Control Panel
1. Press the ‘Windows’ key on your keyboard or click on the ‘Start’ button located in the bottom left corner of your screen.
2. Type ‘Control Panel’ in the search bar and click on the search result that appears.
Step 3: Access System Image Backup Tool
1. In the Control Panel window, click on ‘System and Security.’
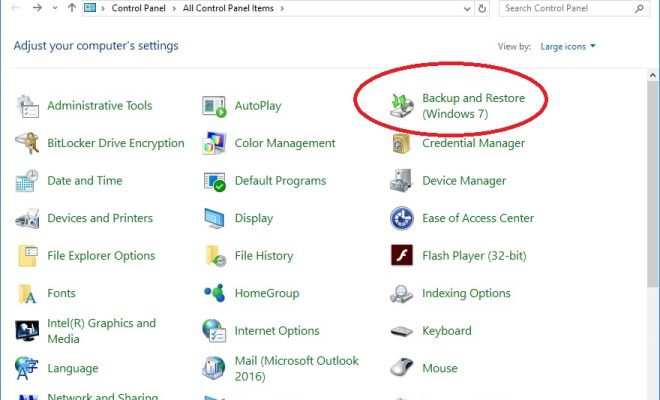
2. Next, click on ‘Backup and Restore (Windows 7).’
3. In the newly opened window, click on ‘Create a system image’ located on the left-hand side.
Step 4: Choose a Backup Location
1. In the ‘Create a System Image’ window, you will be prompted to choose where you want to save your backup.
2. Select ‘On a hard disk’ if you are using an external hard drive or ‘On one or more DVDs’ if you want to use DVD discs.
3. Click on the drop-down menu and choose your external drive or DVD as the backup location.
4. Click on the ‘Next’ button to proceed.
Step 5: Select Drives for Backup
1. Windows 10 will now present you with a list of drives that are available for backup.
2. By default, the system drive (C:) and the system reserved partition are selected.
3. You can also select other drives if you wish to include them in the backup.
4. Once you have made your selection, click on the ‘Next’ button.
Step 6: Start the Backup Process
1. Review the backup settings and confirm your chosen location and drives to be backed up.
2. Click on the ‘Start Backup’ button to initiate the process.
3. The backup process may take some time, depending on the size of your partitions and your computer’s processing speed. Do not interrupt the process or turn off your computer during this time.
4. Once the backup is complete, you will see a confirmation message stating that the system image was successfully created.
Conclusion
Creating a system image in Windows 10 is a straightforward process that provides an essential safety net for your valuable data and operating system. It is highly recommended that you schedule regular system image backups to ensure that you can quickly recover from potential system failures or data loss events. With a reliable system image in place, restoring your Windows 10 computer will be a simple and efficient task when needed.


