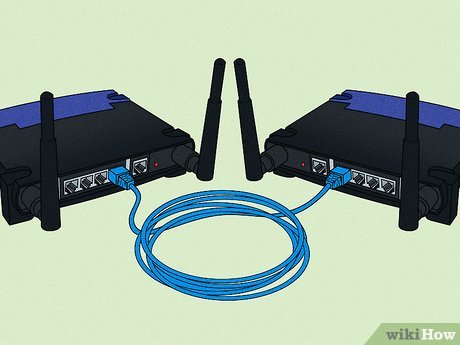
How to Connect Two Routers on a Home Network

In today’s world, where technology has become an integral part of our lives, having a stable and reliable internet connection is of utmost importance. However, there may be instances where one router is not enough to provide adequate coverage in larger homes, leading to issues like poor connection, slow internet speeds, or dead zones. In such scenarios, adding a second router can be an optimal solution. This article provides a step-by-step guide on how to connect two routers on a home network to extend your Wi-Fi coverage.
Before we move forward, let’s understand what we mean by ‘home network’. In simple terms, a home network is a group of devices that are connected to one another through a router or a switch, enabling them to communicate and share resources such as the internet, printers, or files. With two routers, we can create a network that covers a larger area, enhancing the performance and quality of your internet connection.
Here are the steps to connect two routers on your home network:
Step 1: Pick the Right Second Router
First, you need to ensure you have the right router for the job. It must support the same (or higher) standard than the primary router (e.g., Wireless N, AC or AX). A compatible wireless protocol, a similar DHCP IP address range, and subnet mask should work best. Once you have a suitable model, check that it offers an Access Point (AP) mode, as this is the most practical way to add a second router to your home network.
Step 2: Prepare Your Second Router
Once you have the appropriate router, you need to configure it. Connect your computer—using a wired Ethernet cable—to your second router and access your router’s settings by typing in the IP address in a browser window, which is typically located on the underside or back of the router. After you enter the IP, login using your router’s credentials, which may be different from your primary router.
In your second router’s settings, go to the LAN section and change its IP address to an available and unique address within the primary router’s subnet. For example, if the primary router’s IP address is 192.168.1.1, you can switch the second router to 192.168.1.2. Ensure that the DHCP settings of the second router are disabled to prevent IP address conflicts.
Step 3: Configure the Wireless Settings
Next, change your second router’s wireless settings to match the primary router. This means setting the wireless network name (SSID) and password to the same network credentials your primary router uses, so clients switch seamlessly between routers as they move around your home.
Step 4: Set Up the LAN Ports
Once you connect the second router to your network, you can configure the LAN ports. To achieve optimal performance, use the Ethernet ports on the rear of the router, which offer a more stable connection.
Step 5: Connect the Routers
Now that both routers are correctly configured, connect them using an Ethernet cable. Use the WAN port on the second router and connect it to the LAN port of the primary router to connect the two devices, making sure you do not connect any two ‘WAN’ ports.
Step 6: Restart Both Routers
Finally, restart both routers after you connect them to the network. Wait for the Wi-Fi networks to become available again, and test whether you can connect to both routers from anywhere within your home network. Once connected, confirm that you can access the internet from both the primary and the secondary router.
In conclusion, adding a second router to your home network is an effective way to extend your Wi-Fi coverage and reduce dead zones. With the above steps, you can easily connect two routers on your home network and enjoy seamless connectivity throughout your home. By investing a little money and time, you can have a boost in connectivity and enjoy the internet experience you deserve.


